Awww, you SQUEEZIES. Thanks for your sweet comments this week. :) (If you haven’t seen The Nate Show segment, you can see it below. Ignore the cat.)
So, there’s one thing about blogging – I’m held accountable to finish up certain projects. I finished up one this week that I mentioned about six weeks ago. It would have been so easy to let the little final details slide till…oh…the spring. Or summer. Or next fall, when I’m sure I’ll have to tackle it all over again.
But I told you I’d show you…so I finished up and I’m showing you. I hate being responsible and stuff.
This all started when my Sis (affectionately known as Stink Eye) decided to go and get a new, boring, well paying, professional job instead of being myminion assistant. Whatev.
Before she started her new job, I paid her to help me out with a few spots in our house that were overwhelmingly full of crap. I showed you the completed Sanford and Son deck here, and this week I finished up the garage.
It was bad. BAD. Here you go:
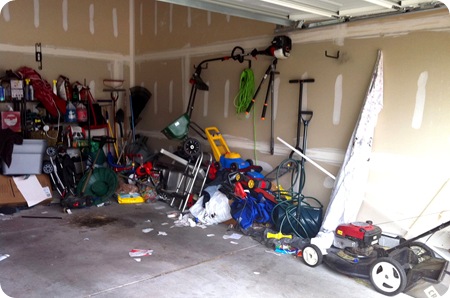
Receipts all over the floor? Check.
Sheet hanging from wall? Check.
Christmas tree stand from eleven months ago? Check.
We are AWESOME.
Here’s the other side:

Chaise lounge waiting to be reupholstered? Check.
Weight machine we haven’t used infive years six months? Check.
No access to my BFF…my SAW…check. (That’s a problem.)
Here’s a closer look:

You can imagine my glee every time I had to get back there to cut something. And my saw sat on this since the day I got it:

It’s about 18 inches off the floor. Talk about comfortable! NOT.
So…the decrapifying started. It was fun. It felt GOOD. I think we took four SUV loads to Goodwill?:

I lost count. There were also three bins full of trash.
When I get to this point, I have zero patience for a garage sale or Craigslist. It has to go NOW. The weight machine was on Craigslist for two weeks for a steal, and no bites. So it, and most of the other stuff we didn’t use or need was GONE baby!
Once we got it cleared out, we took a trip to True Value for some organization goodies:
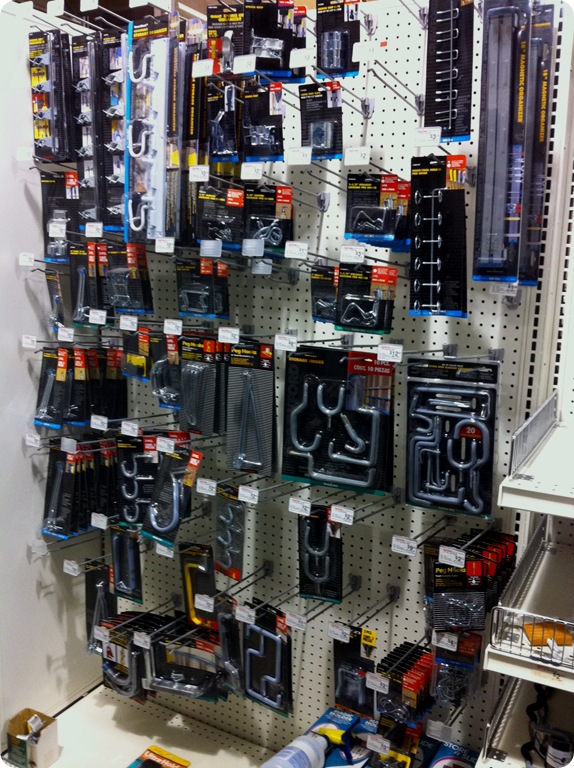
Ahh…just look at it. Beautiful!
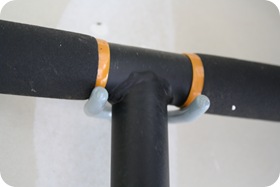
My goal was to get anything and everything possible up and off the floor. If I could hang it, it was going up. We got some holders that worked great!:

 And a TON of these:
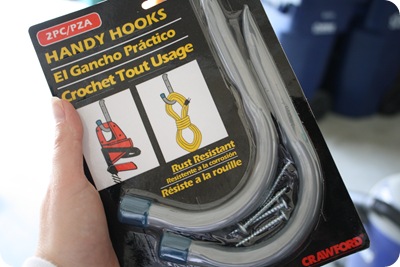
I use these a lot just because they’re so easy to install and they hold quite a bit:

 And we picked up a packet full of different sizes and shapes of these screw in organizers:

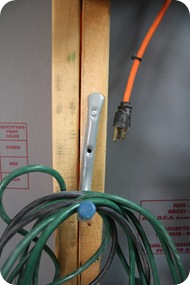
 I hung everything:

Last year, I was trying to avoid spending much on the clean up, so I organized the back wall full of wire shelving as best I could:

But I gotta tell you, it was driving me NUTS. And open shelves meant we would stuff things into them wherever we could. It was a MESS. So this year, I made the investment and got a few storage pieces from Target:

OH MY GOODNESS. So, so, SO worth it. Ack!
I used my dollar store bins and tried to organize things by shelf:

Do you see my spray paint shelf and how it sags in the middle?

:) I’m just happy to have it all in one spot. Giddy, actually.
So here’s the before and after goodness – before, the pit of despair:

And after, with everything off the floor:

If I could hang the lawn mower, I would have. :)
Here’s my little workshop corner before:
And here it is now:

We had a light installed in that spot last year so I can see while using the major power tools. A good idea – I recommend it. ;)
I picked up another storage chest at True Value and it turned out to be a perfect spot for my saw!:

No more kneeling down for every cut!
I have to tell you something – my scrap wood was out of control. I’m not kidding. It was insane. But of everything, it was hardest for me to part with. I swear I was shaking – I love my molding peeps. Sis would stand in front of me, giving me a pep talk – Do you really need an eight inch piece of wood? Really? Do you really need the wood filled with nails? Really? Do you really need 200 scraps of beadboard? REALLY?
It was hard. I waffled often. I’d put something in the bin to get rid of it, then I’d sneak back, pick it up, think about it, take it out.
Then, when I wasn’t looking, STINK EYE got some red spray paint, went over to the bin and sprayed it all over the scrap molding I was supposed to be getting rid of.
CURSES! She’s brilliant! I hate her!
No really, I love her, but you know. I hate her and her smarty pants!
I did keep a fair amount and the smaller sections were organized on the wire shelving, the long pieces we placed in an old trash bin:

 I cleaned up everything as best I could, including wiping down the black door I painted last year:
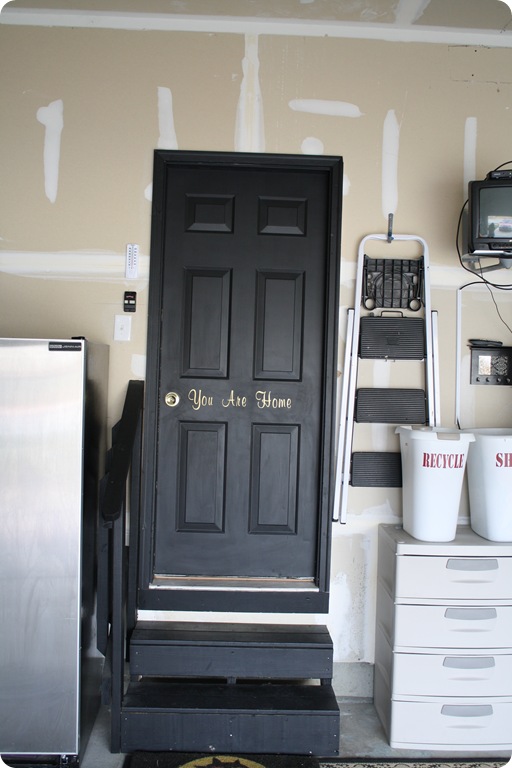
Don’t use cleaning wipes on a black door. They don’t work so well. :)
A little organization and a whole lotta decrapifying, and we have a garage that’s so much more relaxing:

It makes such a difference when we drive into this clean space every day! As always, the decluttering was FREE! And that is the very best part, in my opinion. :)
Of course, there’s some huge projects we haven’t tackled yet -- someday I’d love to paint the walls, but seriously, I have about 2,949 things I want to do before that. Our plan was to insulate and drywall the exterior walls this year, but we haven’t gotten to it. And I’d LOVE to do a treatment on the floors, but that requires taking everything out of there for days – and that gives me hives just thinking about it. :)
Is there a space you want to tackle before the holidays? I know, time is running out -- but everything we did only took about six hours, over two days. It was SO worth it!
Now, if I can just keep the Christmas tree stand out of there this year! That would be a first.
P.S. No idea why Live Writer is shrinking my text this week. Sorry you’re going to need glasses for this one!
*I was one of the bloggers selected by True Value to work on the DIY Squad. I have been compensated for my time commitment to the program as well as my writing about my experience. I have also been compensated for the materials needed for my DIY project. However, my opinions are entirely my own and I have not been paid to publish positive comments.*
Read More
So, there’s one thing about blogging – I’m held accountable to finish up certain projects. I finished up one this week that I mentioned about six weeks ago. It would have been so easy to let the little final details slide till…oh…the spring. Or summer. Or next fall, when I’m sure I’ll have to tackle it all over again.
But I told you I’d show you…so I finished up and I’m showing you. I hate being responsible and stuff.
This all started when my Sis (affectionately known as Stink Eye) decided to go and get a new, boring, well paying, professional job instead of being my
Before she started her new job, I paid her to help me out with a few spots in our house that were overwhelmingly full of crap. I showed you the completed Sanford and Son deck here, and this week I finished up the garage.
It was bad. BAD. Here you go:

Receipts all over the floor? Check.
Sheet hanging from wall? Check.
Christmas tree stand from eleven months ago? Check.
We are AWESOME.
Here’s the other side:

Chaise lounge waiting to be reupholstered? Check.
Weight machine we haven’t used in
No access to my BFF…my SAW…check. (That’s a problem.)
Here’s a closer look:

You can imagine my glee every time I had to get back there to cut something. And my saw sat on this since the day I got it:

It’s about 18 inches off the floor. Talk about comfortable! NOT.
So…the decrapifying started. It was fun. It felt GOOD. I think we took four SUV loads to Goodwill?:

I lost count. There were also three bins full of trash.
When I get to this point, I have zero patience for a garage sale or Craigslist. It has to go NOW. The weight machine was on Craigslist for two weeks for a steal, and no bites. So it, and most of the other stuff we didn’t use or need was GONE baby!
Once we got it cleared out, we took a trip to True Value for some organization goodies:

Ahh…just look at it. Beautiful!
My goal was to get anything and everything possible up and off the floor. If I could hang it, it was going up. We got some holders that worked great!:


I use these a lot just because they’re so easy to install and they hold quite a bit:


Last year, I was trying to avoid spending much on the clean up, so I organized the back wall full of wire shelving as best I could:

But I gotta tell you, it was driving me NUTS. And open shelves meant we would stuff things into them wherever we could. It was a MESS. So this year, I made the investment and got a few storage pieces from Target:

OH MY GOODNESS. So, so, SO worth it. Ack!
I used my dollar store bins and tried to organize things by shelf:

Do you see my spray paint shelf and how it sags in the middle?

:) I’m just happy to have it all in one spot. Giddy, actually.
So here’s the before and after goodness – before, the pit of despair:

And after, with everything off the floor:

If I could hang the lawn mower, I would have. :)
Here’s my little workshop corner before:
And here it is now:

We had a light installed in that spot last year so I can see while using the major power tools. A good idea – I recommend it. ;)
I picked up another storage chest at True Value and it turned out to be a perfect spot for my saw!:

No more kneeling down for every cut!
I have to tell you something – my scrap wood was out of control. I’m not kidding. It was insane. But of everything, it was hardest for me to part with. I swear I was shaking – I love my molding peeps. Sis would stand in front of me, giving me a pep talk – Do you really need an eight inch piece of wood? Really? Do you really need the wood filled with nails? Really? Do you really need 200 scraps of beadboard? REALLY?
It was hard. I waffled often. I’d put something in the bin to get rid of it, then I’d sneak back, pick it up, think about it, take it out.
Then, when I wasn’t looking, STINK EYE got some red spray paint, went over to the bin and sprayed it all over the scrap molding I was supposed to be getting rid of.
CURSES! She’s brilliant! I hate her!
No really, I love her, but you know. I hate her and her smarty pants!
I did keep a fair amount and the smaller sections were organized on the wire shelving, the long pieces we placed in an old trash bin:


Don’t use cleaning wipes on a black door. They don’t work so well. :)
A little organization and a whole lotta decrapifying, and we have a garage that’s so much more relaxing:

It makes such a difference when we drive into this clean space every day! As always, the decluttering was FREE! And that is the very best part, in my opinion. :)
Of course, there’s some huge projects we haven’t tackled yet -- someday I’d love to paint the walls, but seriously, I have about 2,949 things I want to do before that. Our plan was to insulate and drywall the exterior walls this year, but we haven’t gotten to it. And I’d LOVE to do a treatment on the floors, but that requires taking everything out of there for days – and that gives me hives just thinking about it. :)
Is there a space you want to tackle before the holidays? I know, time is running out -- but everything we did only took about six hours, over two days. It was SO worth it!
Now, if I can just keep the Christmas tree stand out of there this year! That would be a first.
P.S. No idea why Live Writer is shrinking my text this week. Sorry you’re going to need glasses for this one!
*I was one of the bloggers selected by True Value to work on the DIY Squad. I have been compensated for my time commitment to the program as well as my writing about my experience. I have also been compensated for the materials needed for my DIY project. However, my opinions are entirely my own and I have not been paid to publish positive comments.*


")

