Showing posts with label DIY. Show all posts

Wednesday, August 25, 2010

DIY Master Suite Headboard.....yes, again.

DIY headboard

My poor husband must think I'm crazy. I love change. Maybe I'm addicted to it? We've lived in our house for about a year and half now. And our bedroom has changed probably....at least four or five times, and that depends on the degree of change. If you count everything...its probably more like twenty.
Well. A week or so ago. I got one of those visions in my head. Don't you just love them? And I couldn't get it out. I knew I wanted to change up the master bedroom a little. I already painted all my furniture. But my vision was telling me that this change had to be more dramatic.
And so....it starts.

Here's where its at so far. Yep. That would be my 3rd....yes, t.h.i.r.d....headboard in a matter of a year in a half.

But isn't she a beaut???
Brown and White Bedroom

I followed the same steps when making this headboard as the now 'retired' one I did in this post.
It only took me an hour to upholster once I got the base how I wanted it. don't you just love DIY headboards.....or DIY anything :)
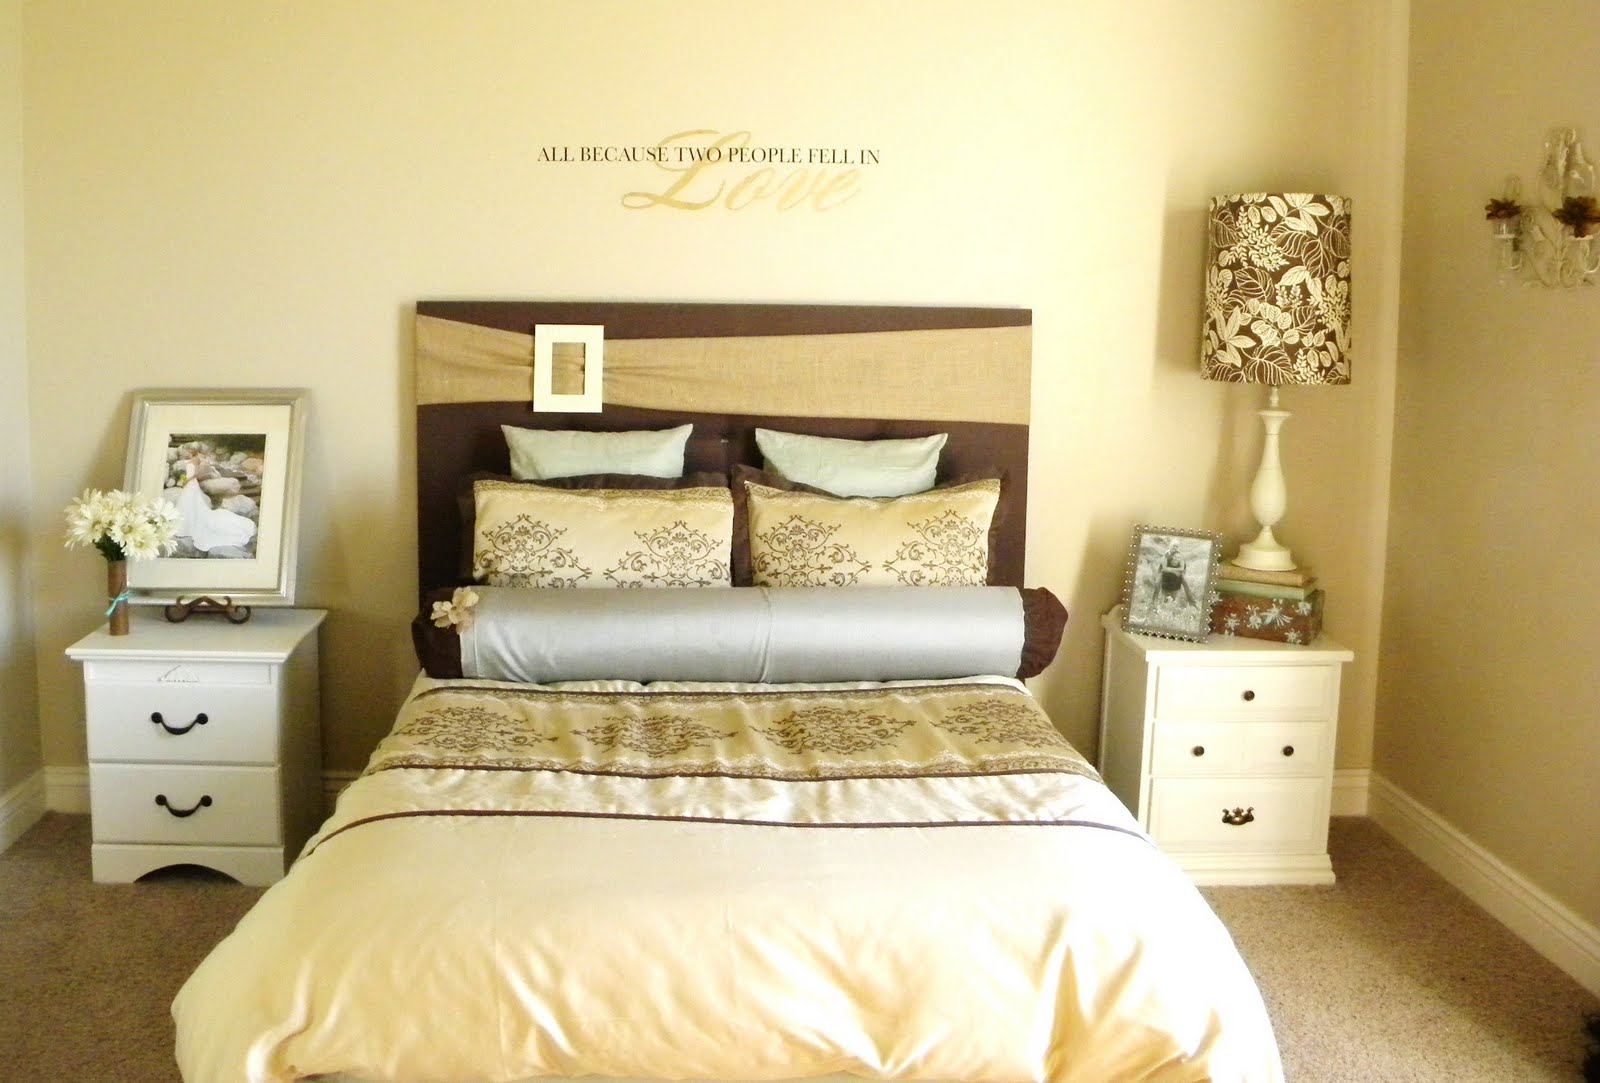
Here's the original headboard....and thus, essentially, the before - before picture of my bedroom:

DIY Headboard

And making progress with the nightstands:
And after! Voila:
White DIY Headboard
All in all....I think it is a good change.

And of course....I had to make it dramatic. Its 80 inches tall, thats six and half feet!

DIY Tufted Headboard
And faux white leather.

I got the fabric half off, so all together, this baby only cost me $30 to make!

DIY Headboard
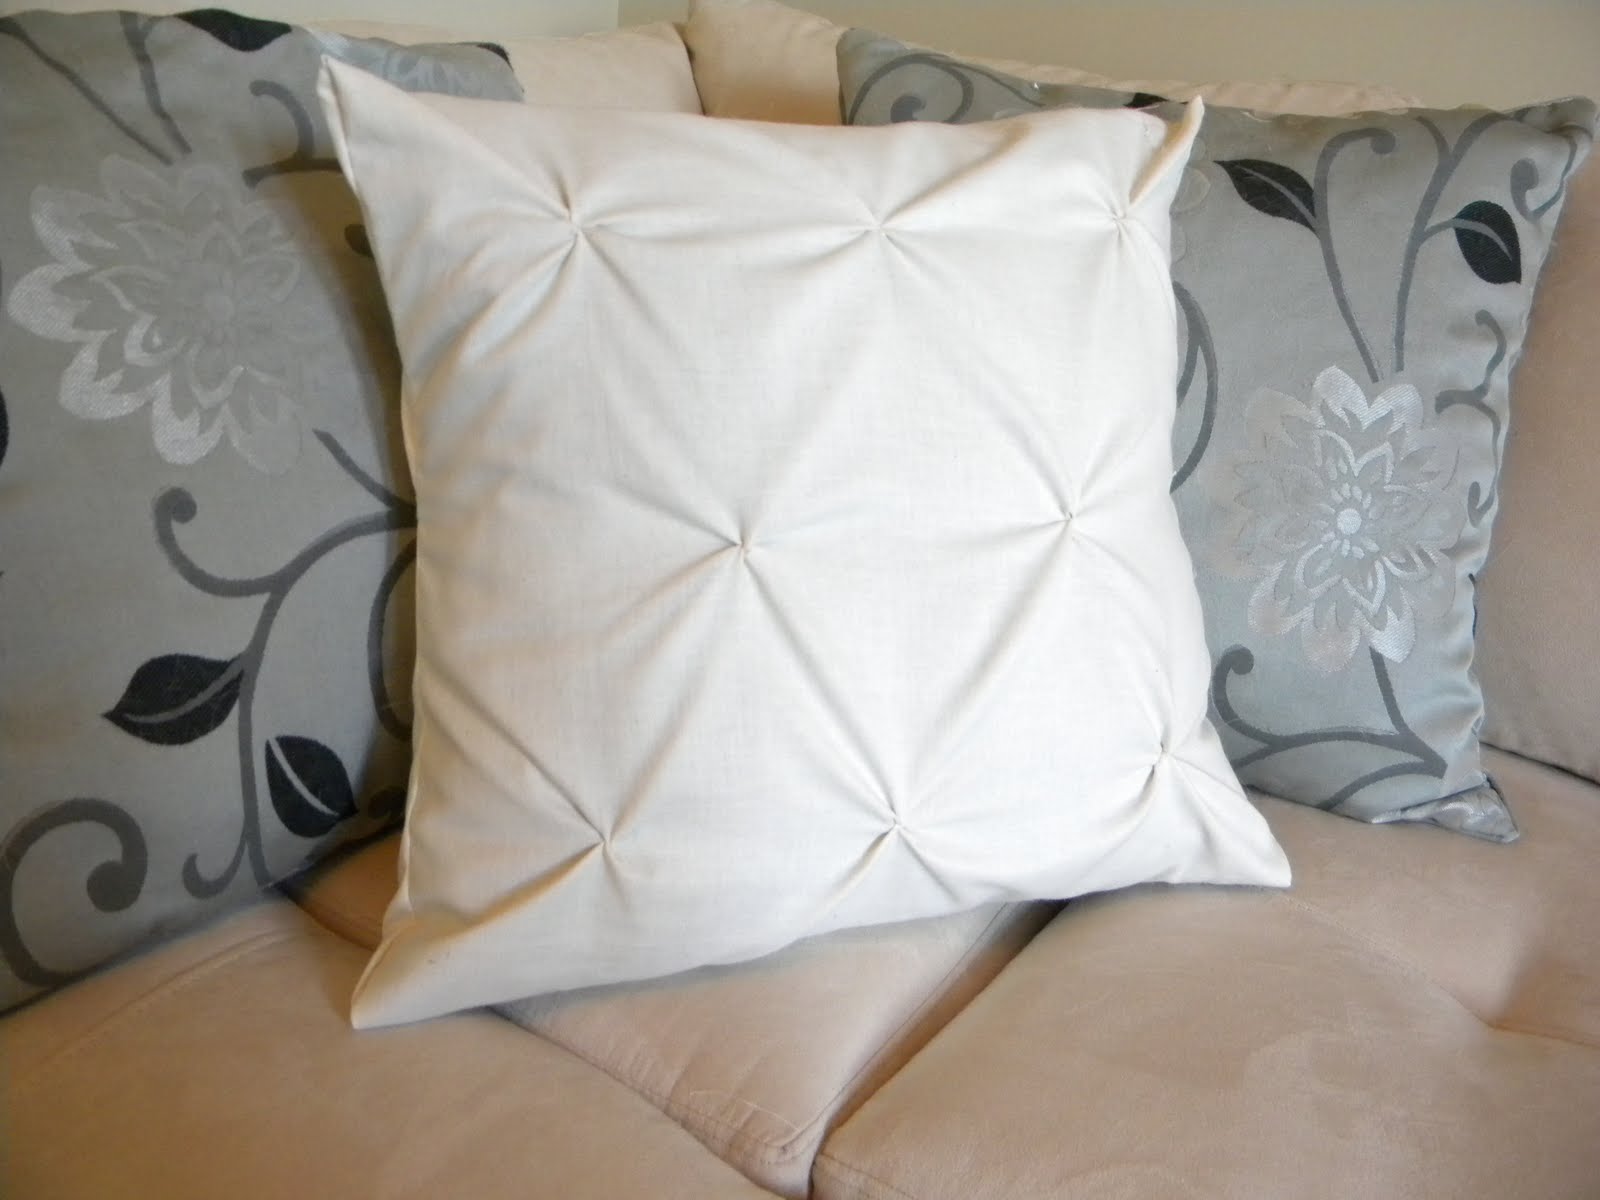
I tufted it simply by aligning 9 points and stapling them with a staple gun.
Then got my hot glue and glued on some bling!

tufted headboard

Now for more drama!!! My beautiful tan walls are now going to be colored mocha!
My curtains are coming down, and new ones are going up... and I'll actually have art on the walls! I'm so darn excited!!! ......sorry babe :)
Alicia

Read More

Wednesday, August 4, 2010

Matching Lamps....finally

Do you see what I see?
Yep. Over there in the left hand corner.
I'm all smiles.
As you know.
I found a lamp to match the one on the right but couldn't find the fabric to match.
I obviously found the fabric.

Here's what the lamp looked like before.
It was only $4:

And after:


I just followed the same steps I did with the other one and my burlap lamp, found here.

So, here it was in the beginning.
No painted furniture.
No matching night stands (not that they have to match, but anything would be better than my little table there)
And no matching lamp:

Here it was after the before.
With matching, painted night stands:
Getting better.
Right?

And now!

I'm totally liking it.
Now to just finish the rest of the room.
I'm sure eventually I'll get around to it.

Just from a different angle:
Here's the post, just in case, to making a super easy and cheap headboard, like mine.

So, here's another before.
Blaaaah:

And after:
Sorry for the crazy colored pictures.
It's rainy and cloudy here,
which apparently doesn't make for the best lighting when taking pics.

Stay tuned....
for more of my master bedroom makeover.
It may not come tomorrow,
but,
hopefully, it'll come soon.
Cuz i'm sick at looking at oak colored dressers.

Enjoy the rest of your summer!

Alicia


Read More

Thursday, July 22, 2010

Witches Hands

Okay. First things first.
To finish up last week's order of business.

After much scouring...
I found the fabric!
I had to go into the next town.
But. I found it.
So. My lamp shade is now happy :)
And so am I.
Especially because now I don't have to unstitch the pillow cover I made out of the original left over fabric I made here.


Now on to today's order of business.
I decided that I needed to add a little pizazz to the mantel in our family room.
The ceilings are like 20 somethin' feet high and I have nothing on them. So there's a lot of empty space.
But I think I like it. I kept everything down low so it seemed more cozy.
But. I decided because I have so much unused height, I needed to make up for it.
And for some reason.
I made up for it this way:

You can barely see it, but its a long twirly winding branch that goes pretty high on the mantel next to the picture.

I liked it. But I thought it may have competed with the willow branches in the 'hole' next to fire place.


And my husband thought it looked like a witches claw hand stretching up the wall.
I'm not sure where he got that idea.
But I guess I kind of agree.
But all in all. It has stayed like this for quite some time.

Here's the goods to make it:

I found this 'vase' for like $3.
The flower foam stuff was from the dollar store and so was the moss.
The spray glue I already had on hand.
Put them all together and you get this:

Now that I look at it in retrospect, I should have used a bigger vase.
Oh well.

So, since my husband got his way....months and months down the road.
And mainly because I change things up pretty often.
And also because I knew this room below needed some extra pizazz too.
And I like to add nature into my living spaces.
Here are the 'witches hands' in our front room:

What do you think?
Better place for them?

I'm thinking I'm totally digging it.

Of course. Time changes as do tastes.
So. It will probably be different in a few months/weeks.
Especially cuz I'm planning on doing some board and batten in here.
And moving the sectional back out to the family room where it belongs and will get more use.
Well. Thanks for listening to my rambles.
Hope you enjoy the rest of your summer!
Alicia


Read More

Sunday, July 4, 2010

DIY Textured Pillows

Ever swoon over textured pillows like these?
DIY Textured Pillow

Well. They are so super easy to make, so stop swooning :) They will only cost you the cost of the fabric. You can learn how to  make 10 minute pillow covers here.
And then.... 
  1. Turn the pillow cover inside out. 
  2. Mark with a fabric pen the areas you want the 'puckers'.
  3. Then pinch the fabric where you marked it.
  4. Get a needle and double thread it and knot the end of it.
  5. Pass the needle through your 'pinch' and wrap it around the pinch a few times, passing the needle through the pinch every once in a while.I did this about 4 or 5 times on each pinch.
  6. After you're done, pull the thread tight and knot it off.

Do this on every mark.


Now turn inside out again.
And your done!

DIY Pucker Pillow

I use to have lots of boring pillows lying around, so I pretty much took a needle and thread to every one of  them :)This one, we sit on and move around a lot, so its not in its best shape, but the puckers have stayed together!


Here's another one:
You can put as many pinches as you want as close together as you want, maybe only in a strip down the middle or on the side. Just depends on what look you're going for and how long you want to spend on it.

Update::
Here's another great project you can do using puckers! Make your own duvet cover just using some sheets and spice it up with this same technique :) Click here to see the tutorial.


Read More

Tuesday, June 15, 2010

DIY Planter Boxes

So.
I admit.
I was a little MIA.
For awhile.

But, that's what the summer will do to ya' now huh?

You know another thing summer will to do you?
Make you spend gobs and gobs of money on flowers and plants.
Take my word for it, I know by experience.

So, now with my newly acquired gobs and gobs of flowers and plants (which obviously replaced my gobs of money), I need a place for them now don't I?


*ding*ding*
Problem solved.
Planter boxes!!!

So, I had this great idea (and totally easy by the way) to create a long rectangular planter/window box.
But, my husband didn't just want them to be 'rectangular', so he took over and gave them a little attitude with a nice angled edge.


Which by the way....making these took for.e.e.e.e.e.e.ver.
Like forever as in if we would have stuck with my original plan, it would have been done a week earlier.
Anyway.
Since he did these, I helped a little, but......really,
all I know is that the magic number is 15. (for the angle)
So, a picture speaks a thousand words right?
Well, here you go, cuz I'm not spending the time to explain how to make these :)


We made the longest at 3 feet long, the smaller ones at 2 1/2 feet.
These are made out of cedar planks and secured by cut up pieces of 2x2.
We drilled some holes in the bottom.
Painted and sealed.
And .....a week in a half later.
We finally had our beautiful planter boxes!!!

So. Then we came across a little problem.
How does one hang these newly assembled planter boxes on a railing?
Any ideas??
No?
Well. We batted this back and forth for awhile too.
And came up with this stuff:


Thats right....screen door pulls and felt bars.
(felt bars so it wouldn't scratch up the rails)

See how they work....

Ingenious huh?

I guess we'll see how they stand up to the weather and weight and what not.

Here are our babies now:


We're hoping the flowers on the ends will start cascading over the boxes.
*Cross your fingers* cuz we all know I'm a plant killer.

And my Max buddy helping momma:


I think he's happy with the planter boxes too.

Alicia
Read More

Thursday, June 3, 2010

DIY Candlesticks / Plant stand

Ready to beef up those DIY muscles? What do three pieces of wood equal? A magnificent candle stand, plant stand, do.whatever.you.want.with.it stand.Yep.

Here are the supplies:
8 foot 4x4 of Douglas fir.
however long 2x6 (I think it really measures to 2x5 1/2) of whatever wood
drill
screws
wood filler
wood glue
paint
And if you choose to go with my direction:
Compound Miter Saw
Router/Router table

Alrighty. Now lets get started. I cut the douglas fir into three different lengths with the miter saw. Choose whatever lengths you want. Then cut the 2x6 into 6 squares. These will really have sides of 5 1/2 by 5 1/2 once you're done.
Use the router to decorate the edges of the squares to your liking.

Next. Use a large drill bit to make a hole a quarter of the way down on one of the squares side...this part will be the top and bottom of the stick...so make sure you think that through considering your routed edges.

Now apply the wood glue to the 4x4 and press one of the squares in place and center it. Let it dry.
Do this to the other side.

Now your drilled 'hole' should be visible if you did this right.
Now drill a screw through the hole on both sides. I had to use 2 inch screws for this.

Now fill the hole up with some wood filler
Let dry for a few hours and sand.
These are what you should have come up with:
See. You can't even see the holes anymore if you look reeeeeal close.
Now Paint Those Babies!
(excuse the dog...he wants to be involved in everything)

Okay. Sand the edges to distress them a little bit.I did this pretty much on every single edge.
Then stain the now distressed edges.You can use a furniture fix-it marker for this or real stain.
I did both and can't even tell which one is which.

And there you have it!

I added a stencil on the top to have a little pizazz.

I routed the edges on the bottom of the top square and the top of the bottom square. You can barely see it in the pics...but trust me...they.look.gorg!!

See. You can put whatever you want (and that will fit) on it.
Candles, vases, plants, dog, cats, kids, a cup of milk, some soda....whatever....your dinner.
Hmmm. I guess the possibilities are endless.

Okay. Now for those of you who don't have a router.
Get one.
But....until then.

You can do it this way to add a decorative edge.I just used plywood for these squares.
I cut one at 5x5 and one at 4 1/2 x4 1/2. Wood glued them together. Then used the same technique as above to finish the project.

Looks good eh?
(side note...do these pics look really yellow to you? I have two computer screens and one says yes..and the other says no.)

Anyway. These ones are super tall. like 4 feet I think about. I stenciled all the way up and down.
I think they look like they belong in a cathedral.
I'm not sure why.

Here's the same technique...only smaller...in white.With burlap.And ribbon.
*sigh*

I really have no idea what to put on these. Because...as you all should know by now....I have an OBSESSION with candles. Like I have about 60 candles (very rough estimate) on the first floor of my house alone. I really don't burn these candles...they are just for decoration. Oh....Add 4 more to that...I just remembered where I had more. Anyway. Some of them are burned....some not.
Anyway.
OBSESSION.
So, with these 'candle sticks' I was trying to not put any candles on them. And these were lying around. hmmmm. What do you think?

Alright girls!
Now get crafting!
or...woodworking!

Read More