Showing posts with label decorating. Show all posts

Sunday, November 14, 2010

A thankful foyer

Hello all! Hope you had a great weekend! We are DONE with marching band season (so proud of them!!) and I now have my hubby back…for approximately two weeks. :)

I haven’t done anything crafty in a while and last week I was feeling my mojo creeping back…so I got busy on a quick Thanksgiving project for our foyer.

I’ve been admiring the cute “Thankful” banners I’ve seen over blogland lately, and figured it was high time I made one of my own. I picked up about $3 of paper from Hobby Lobby:

And warmed up my sah-weet Silhouette machine:

My original thought was to do some circles, then put leaves in pretty colors over those, with letters on the leaves to spell my thankful message:

But after I cut out the leaves, I realized they were going to be way too small for the letters. Plan B was to cut out additional circles a bit smaller than the original ones:

I love love LOVE that cardstock – I use it all the time. It’s got a simpler, lined side, and a side (the one I prefer) with a linen-like texture to it. And aren’t those scalloped edges too cute? (I purchased the design on the Silhouette site for a buck.)

When I was done cutting, I ended up with large and small circular cut outs, the leaves that I wanted to try to use, and the letters:

Normally I use spray adhesive for paper projects, but the glue stick was closer. :) It worked great!:

Using my hole puncher, I added two holes in each one, then strung the letters and little leaves on some twine. I absolutely LOVE how it turned out!:

Isn’t that so stinking cute?

I had the buffet in our foyer dressed for fall six weeks ago, but took it all down for the Halloween display. I just put everything back the way I had it, even though it’s only for a few days, week, couple of weeks till Christmas starts peeking out. :)

I plopped one of my (real) blue Cinderella pumpkins on some burlap:

Can you believe I’ve had that pumpkin for about eight weeks now? It’s still perfect! Crazy.

Back in August, I was strolling through Pier 1 and saw some beautiful faux leafy stuff, and it was gorgeous. I especially loved that it was really, really tall and full. I knew I’d need a few of them though, so I held off. (They weren’t really cheap.)

Imagine my glee when I saw something very similar at Hob Lob:

I think they were $3 each, half off? Wicked good. :)

When we were working on my father-in-law’s house a couple of months ago, I saw this beautiful amber glass piece and swooned:

Isn’t it gorgeous? Perfect for my fall display!

I filled it with little beady stuff, pine cones and acorns I’ve used through the years:

All together, with our new Give Thanks garland on the mirror, and it’s a lovely, warm welcome!:

You’ll notice my Cinderella pumpkin tower shrunk by one. I noticed the other day that the middle one had cracked and it was NASTY. Ew!

I can’t even believe the difference a year makes – this little bitty table just didn’t do it for that spot:

Thanks to Craigslist, I have a lovely new spot to decorate each season!:

Yippeeee! For that, I am thankful. ;)

I’ll show you a few more of my fall goodies soon, and then it’s all over folks – get ready for some magic!!!

Are you still working on fall decor? Has Christmas crept up around your house?

Thank you to my sponsor!:

Read More

Wednesday, August 25, 2010

DIY Master Suite Headboard.....yes, again.

DIY headboard

My poor husband must think I'm crazy. I love change. Maybe I'm addicted to it? We've lived in our house for about a year and half now. And our bedroom has changed probably....at least four or five times, and that depends on the degree of change. If you count everything...its probably more like twenty.
Well. A week or so ago. I got one of those visions in my head. Don't you just love them? And I couldn't get it out. I knew I wanted to change up the master bedroom a little. I already painted all my furniture. But my vision was telling me that this change had to be more dramatic.
And so....it starts.

Here's where its at so far. Yep. That would be my 3rd....yes, t.h.i.r.d....headboard in a matter of a year in a half.

But isn't she a beaut???
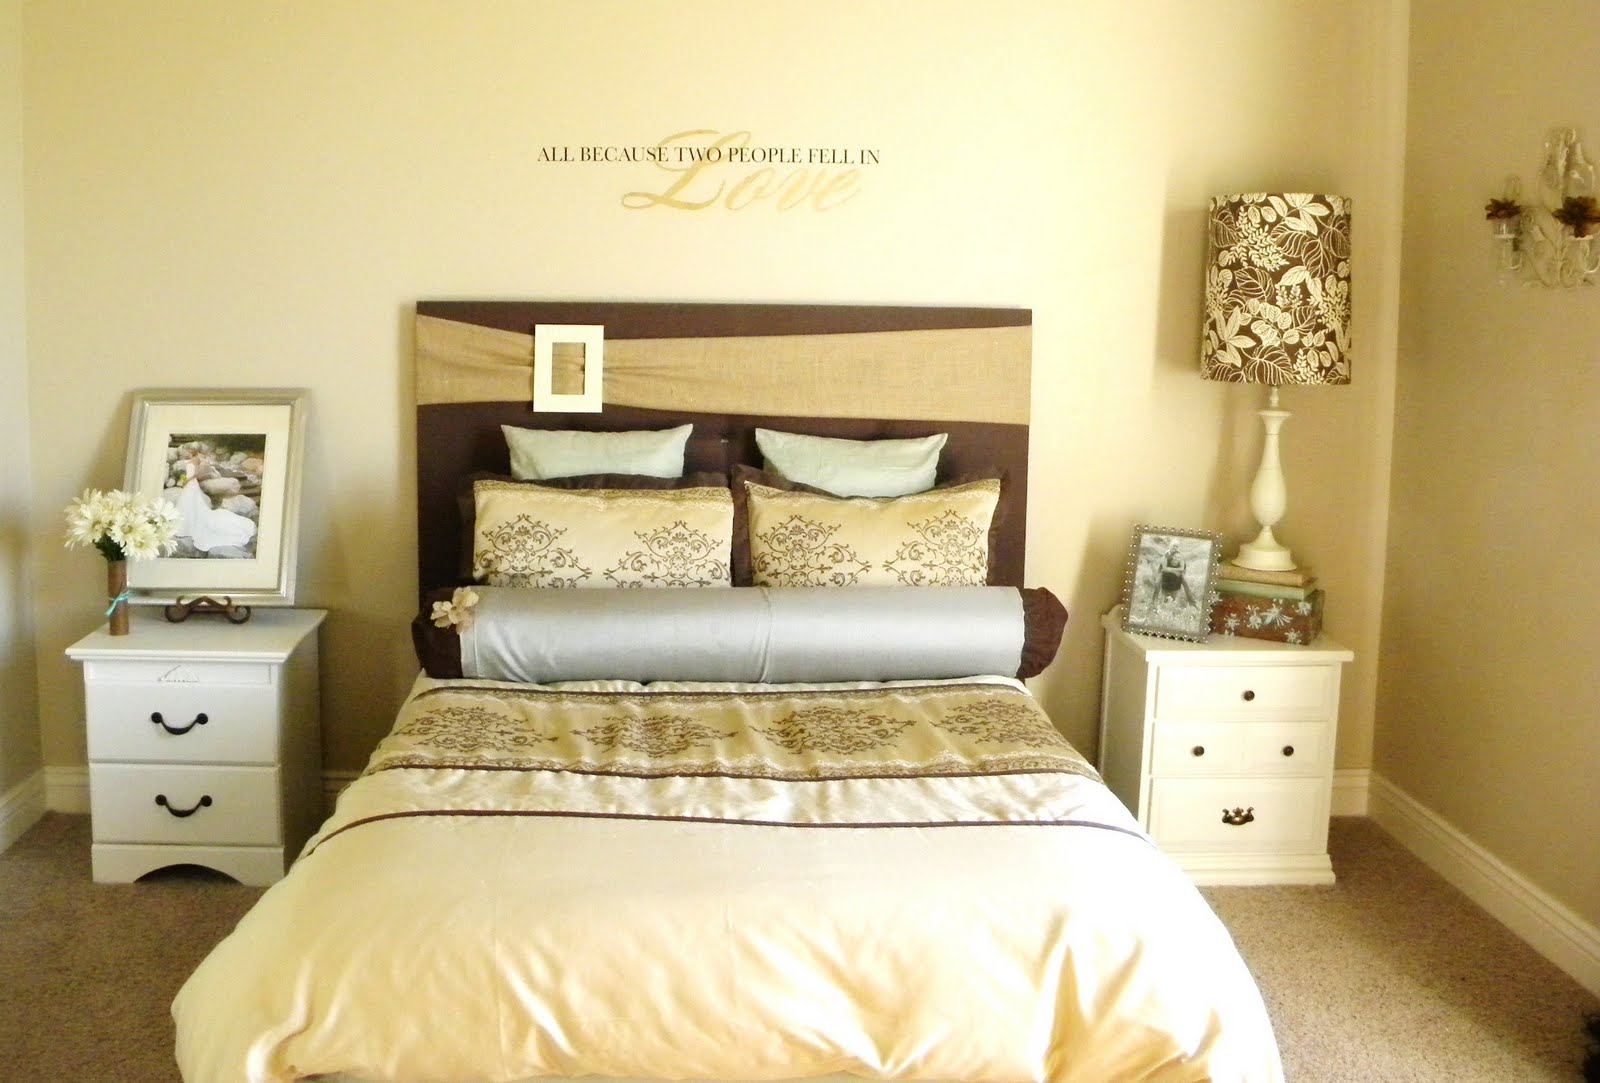
Brown and White Bedroom

I followed the same steps when making this headboard as the now 'retired' one I did in this post.
It only took me an hour to upholster once I got the base how I wanted it. don't you just love DIY headboards.....or DIY anything :)
Here's the original headboard....and thus, essentially, the before - before picture of my bedroom:

DIY Headboard

And making progress with the nightstands:
And after! Voila:
White DIY Headboard
All in all....I think it is a good change.

And of course....I had to make it dramatic. Its 80 inches tall, thats six and half feet!

DIY Tufted Headboard
And faux white leather.

I got the fabric half off, so all together, this baby only cost me $30 to make!

DIY Headboard
I tufted it simply by aligning 9 points and stapling them with a staple gun.
Then got my hot glue and glued on some bling!

tufted headboard

Now for more drama!!! My beautiful tan walls are now going to be colored mocha!
My curtains are coming down, and new ones are going up... and I'll actually have art on the walls! I'm so darn excited!!! ......sorry babe :)
Alicia

Read More

Wednesday, August 4, 2010

Matching Lamps....finally

Do you see what I see?
Yep. Over there in the left hand corner.
I'm all smiles.
As you know.
I found a lamp to match the one on the right but couldn't find the fabric to match.
I obviously found the fabric.

Here's what the lamp looked like before.
It was only $4:

And after:


I just followed the same steps I did with the other one and my burlap lamp, found here.

So, here it was in the beginning.
No painted furniture.
No matching night stands (not that they have to match, but anything would be better than my little table there)
And no matching lamp:

Here it was after the before.
With matching, painted night stands:
Getting better.
Right?

And now!

I'm totally liking it.
Now to just finish the rest of the room.
I'm sure eventually I'll get around to it.

Just from a different angle:
Here's the post, just in case, to making a super easy and cheap headboard, like mine.

So, here's another before.
Blaaaah:

And after:
Sorry for the crazy colored pictures.
It's rainy and cloudy here,
which apparently doesn't make for the best lighting when taking pics.

Stay tuned....
for more of my master bedroom makeover.
It may not come tomorrow,
but,
hopefully, it'll come soon.
Cuz i'm sick at looking at oak colored dressers.

Enjoy the rest of your summer!

Alicia


Read More

Tuesday, July 13, 2010

Up the creek without a paddle.

Want to hear a sad story?
So. I'm all excited because I'm in the middle of a mini-master bedroom makeover.
I'm painting the dressers, the nightstands, the mirrors, lamps, and anything else I can get my hands on.
I'm actually going to hang stuff on the walls :)
I may even change the curtains.
MAY.
I'm kinda liking them still and not ready to part.
But who knows?

So. Before, I only had one nightstand that had a lamp.
The other 'nighstand' was a table with a huge picture on it. No room for a lamp.

Ugly huh?

But. Now I have two REAL nightstands and both beautifully painted :)

So, of course I have to get another lamp to match the lamp that is already there.

And. I know humongous drum shades aren't an every day thing at the thrift store.
But I decided to try.
And guess what.
I found the perfect HUGE drum shade to match the already HUGE drum shade in my room.

$4. Yep.

I go home. Get to work spray painting the base.
Go to the store to buy matching fabric for the shade.
No matching fabric for the shade.
I look around a little more.
Nope. Not there.
I look in the clearance fabric area.
Nope.
Look every where it shouldn't be, because who knows, ya' know?
And still not there.

Frustrated I go home.
Today. Go to the other store miles and miles away.
Look around.
See the coordinating fabric, but still no sweet pretty botanical I NEED TO HAVE NOW fabric.
I do the same aforementioned looking around and heart pounding and pits sweating deal.
Still don't see any.

So. I go online.
And good grief!
Can't find it online either.

What is a girl to do?

I know I can redo the other lamp into a fabric that is available.
BUT.
I love the botanical print fabric.
That's why I got it in the first place.
And next.
I don't want to undo work that I love and redo it again and hope that I love it even half as much.
Anyway.
Thank you for listening to my saga.
Stay tuned, I guess.
Because somehow I have to figure this whole thing out.

Alicia

Read More

Sunday, July 4, 2010

DIY Textured Pillows

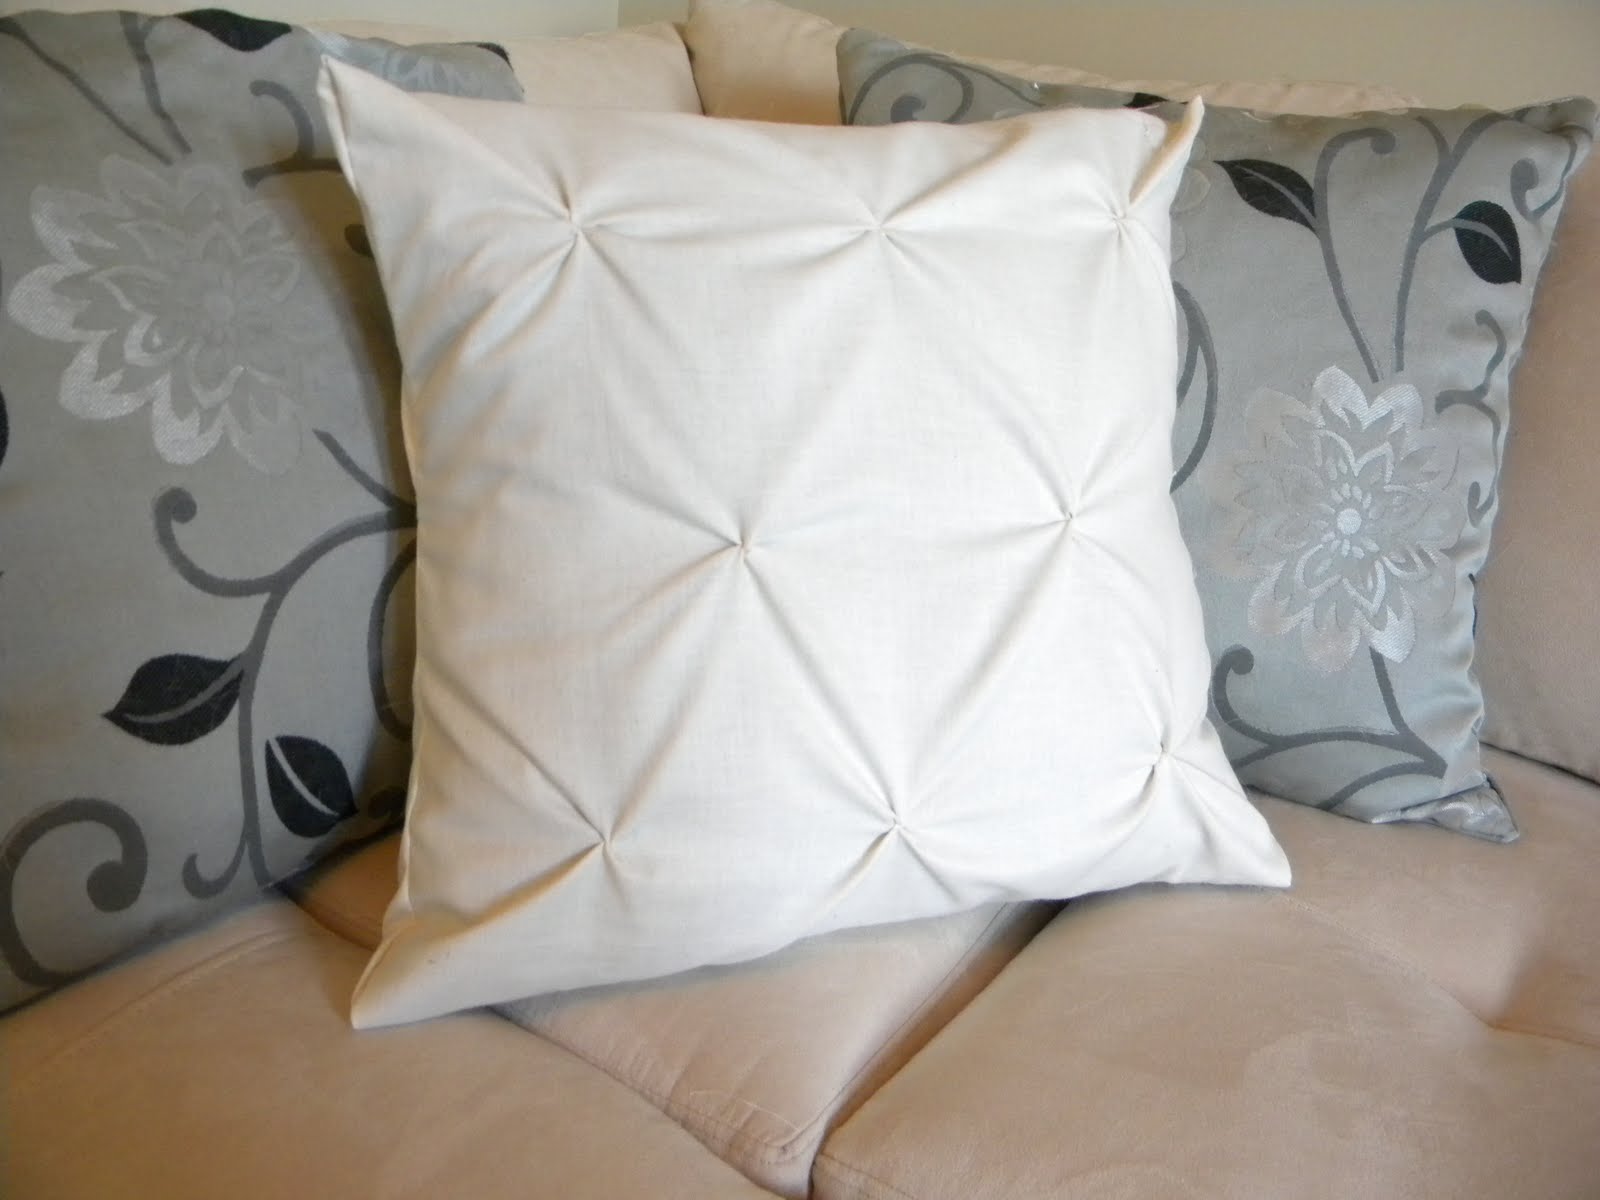
Ever swoon over textured pillows like these?
DIY Textured Pillow

Well. They are so super easy to make, so stop swooning :) They will only cost you the cost of the fabric. You can learn how to  make 10 minute pillow covers here.
And then.... 
  1. Turn the pillow cover inside out. 
  2. Mark with a fabric pen the areas you want the 'puckers'.
  3. Then pinch the fabric where you marked it.
  4. Get a needle and double thread it and knot the end of it.
  5. Pass the needle through your 'pinch' and wrap it around the pinch a few times, passing the needle through the pinch every once in a while.I did this about 4 or 5 times on each pinch.
  6. After you're done, pull the thread tight and knot it off.

Do this on every mark.


Now turn inside out again.
And your done!

DIY Pucker Pillow

I use to have lots of boring pillows lying around, so I pretty much took a needle and thread to every one of  them :)This one, we sit on and move around a lot, so its not in its best shape, but the puckers have stayed together!


Here's another one:
You can put as many pinches as you want as close together as you want, maybe only in a strip down the middle or on the side. Just depends on what look you're going for and how long you want to spend on it.

Update::
Here's another great project you can do using puckers! Make your own duvet cover just using some sheets and spice it up with this same technique :) Click here to see the tutorial.


Read More

Monday, April 26, 2010

Raise the Roof

Happy Monday! I hope y'all had a good weekend. Don't you just hate how fast they go by? Ugh.

So I decided to take my own advice....(which, by the way, I have done in every other room in our house, except this one, so don't get onto me)....and raise the curtains to the ceiling. As you all know....or should know....raising the curtains to the ceiling, especially in a small room, makes the room appear larger and taller and just all over more wonderful :) I also try to hang my window treatments wide, so it gives the illusion that the windows are that much larger too.

When we first moved in, I needed a quick fix for our front room's french doors. I had a curtain rod and some curtains from our old place, so I just threw them up so we could get some privacy. About a year later...they were still there. I loved them, but they bugged me every time I went into our front room, but I couldn't raise them higher without getting new window panels or freaking out by putting new holes in the wall, so they just stayed there:

I finally got the courage to make more holes in my walls and raise them up to the ceiling. I figured the panels would just cover the holes anyway. Right?Yeah...I love quick fixes :)

Since the panels were too short, I just added some fabric I got from Joanns to the bottom of the white (and  of course, Joanns was having a 50% off sale on their red tagged fabric, so as usual....I got more than I really needed. So that means, more sewing projects for me!)
With all the fixes, here's our front room today:

It totally makes the room look more grand. And it brought a whim of formality.

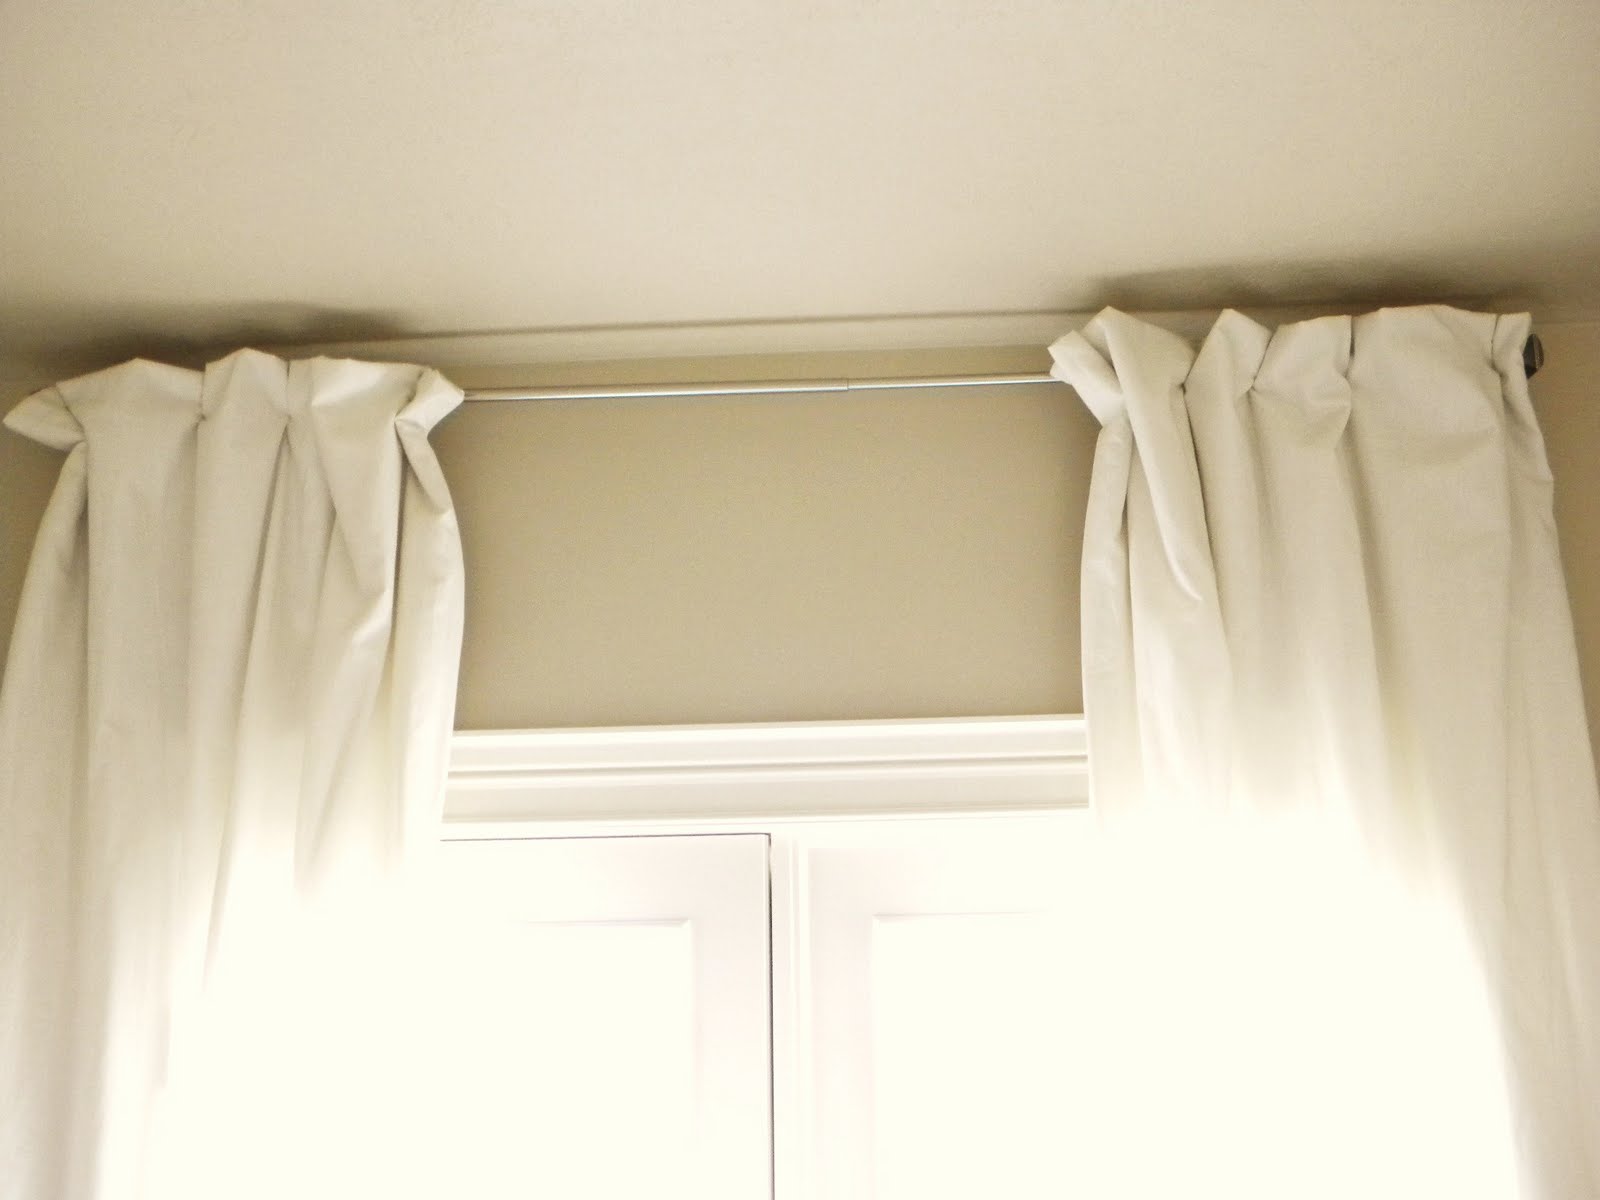
With adding the fabric to the bottom, I wasn't liking the tabs on the top ~it was just too casual, so I just folded them and secured them under to look like this:

 
This was sooo simple to do, I have done it with almost every window in our house, mainly because I hate sewing curtains....and this totally takes care of that.

I measured where I wanted the panels to hit the floor....and made sure both panels were exactly the same to match up the line where the white fabric stops and the blue begins.
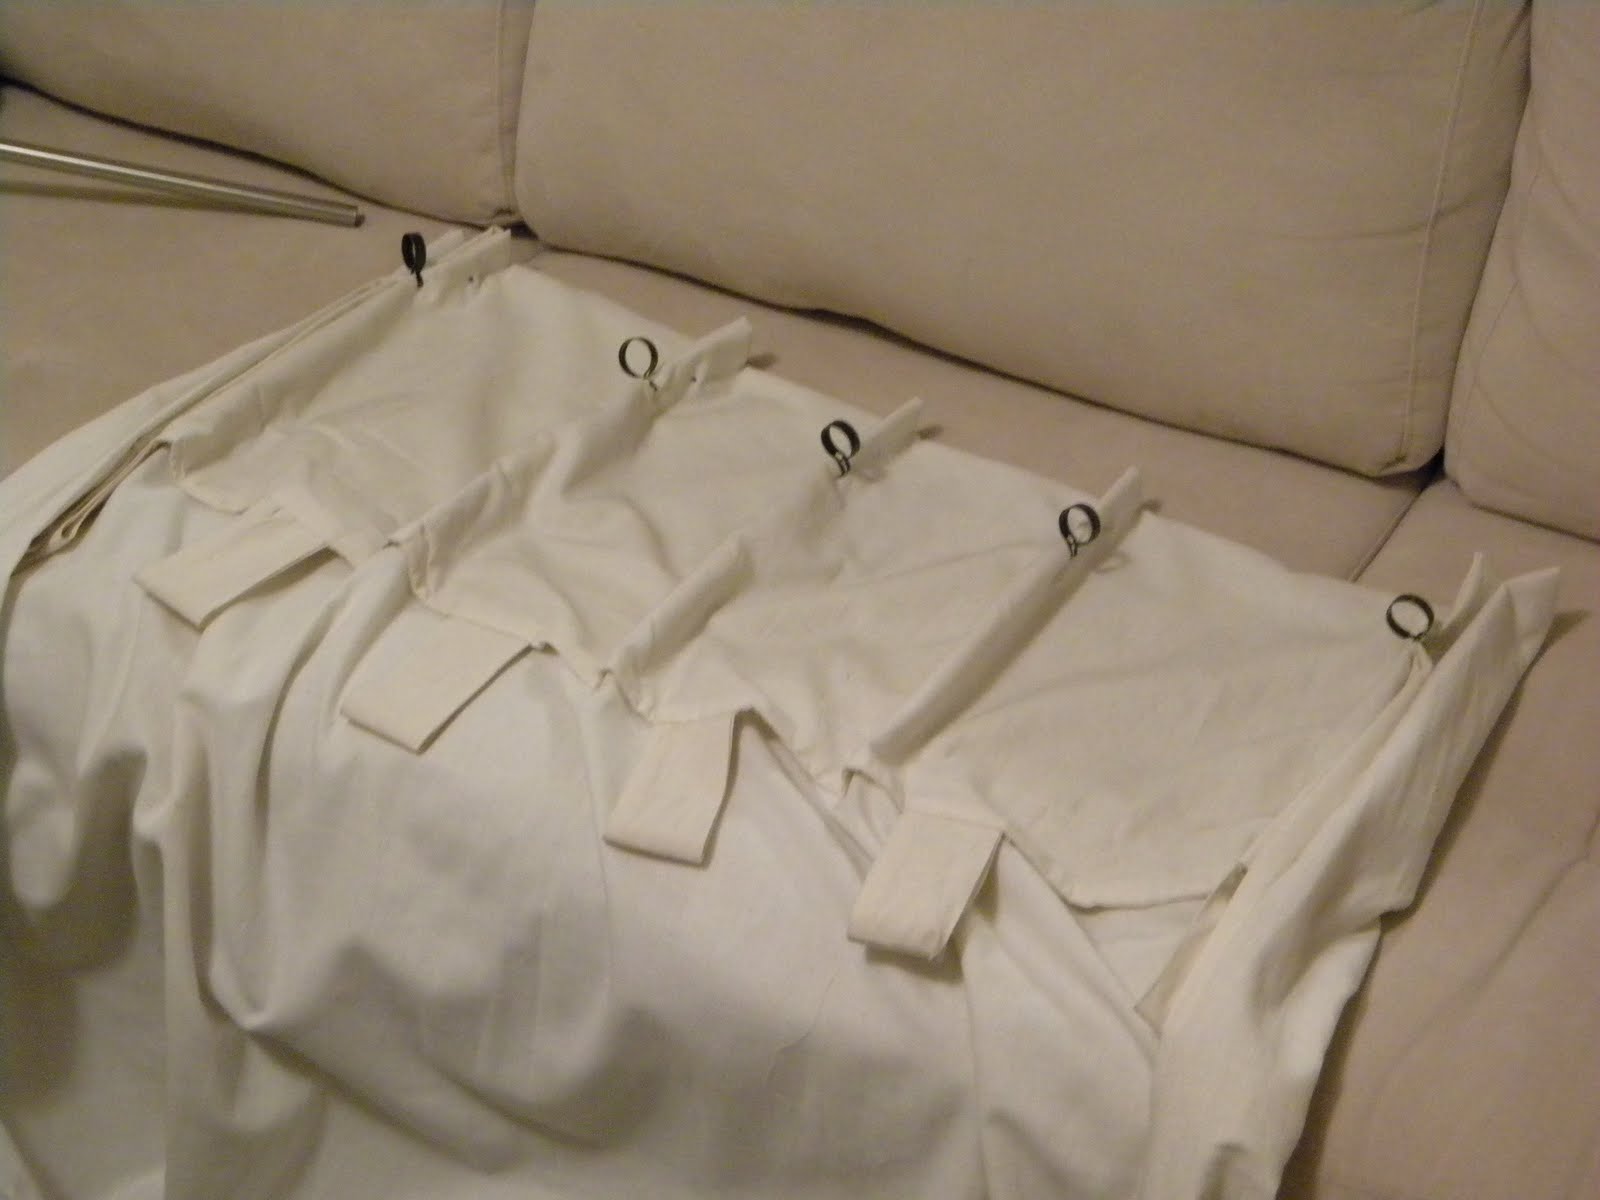
I then folded the panel over, measured and secured it with cafe curtain rings:
To keep the pleated look all the way up to the top and so they wouldn't fall over, I secured the upper portion with a pin and bent it back towards itself (this totally could have been down with a safety pin...but I couldn't find any):
If you are going to do this....make sure each panel is identical, so you don't have one panel higher to the ceiling than the other...I think I measured my 'pinch' with the cafe curtain rings at about 2" from the top. It took me ohhhh about 4 or 5 times of putting the rod and curtains up, then taking them back down to get a perfect measurement. But it was worth it.

Yay! Now I can actually go and sit in the room and not stare sorely at the window treatments :)
Now....I'll stare happily :)

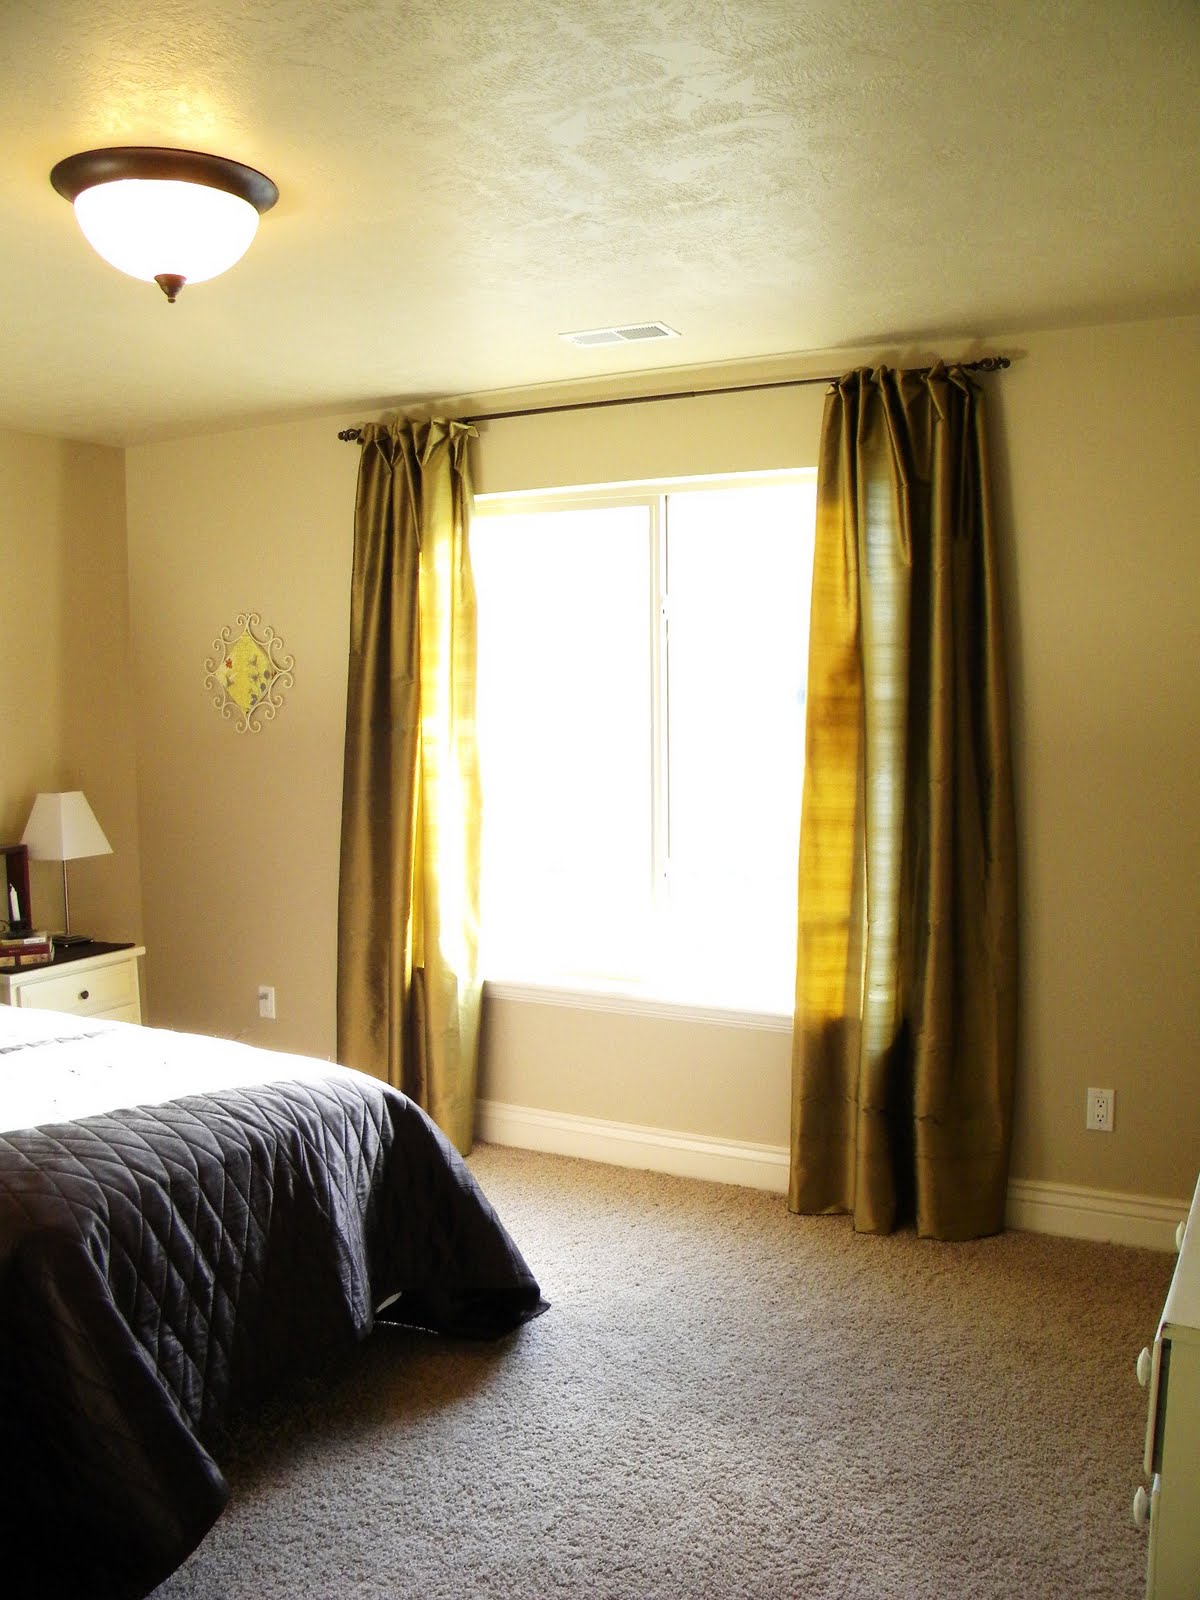
Here I did the same thing with just about six yards of fabric in our guest bedroom.
I hung these ones pretty wide, so I'll probably fill in the empty space with two more panels or some bamboo blinds:
These are the french doors in our dining room. I did the same thing with about six or seven yards of fabric...total no sew curtains.
Love it!
(don't mind the pheasant tail in the top corner....I guess its his house just as much as it is mine.......)


Read More