Happy Monday! I hope y'all had a good weekend. Don't you just hate how fast they go by? Ugh.
So I decided to take my own advice....(which, by the way, I have done in every other room in our house, except this one, so don't get onto me)....and raise the curtains to the ceiling. As you all know....or should know....raising the curtains to the ceiling, especially in a small room, makes the room appear larger and taller and just all over more wonderful :) I also try to hang my window treatments wide, so it gives the illusion that the windows are that much larger too.
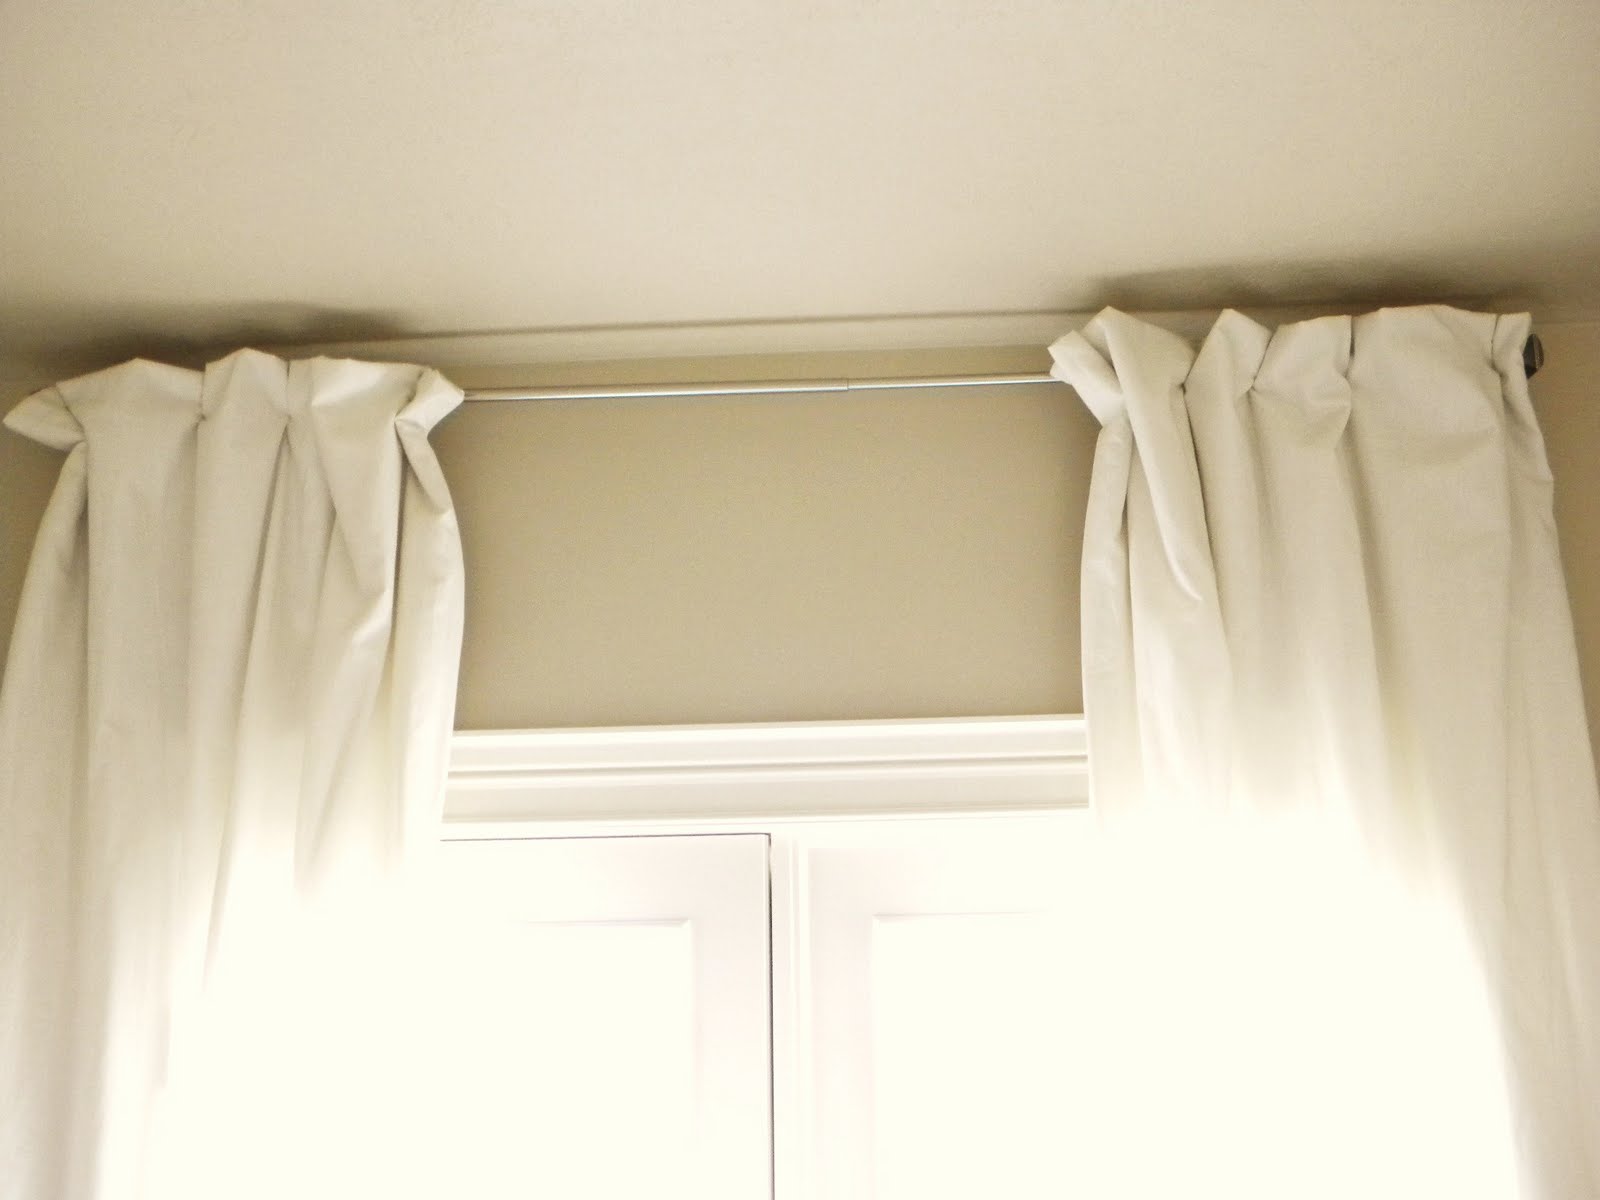
When we first moved in, I needed a quick fix for our front room's french doors. I had a curtain rod and some curtains from our old place, so I just threw them up so we could get some privacy. About a year later...they were still there. I loved them, but they bugged me every time I went into our front room, but I couldn't raise them higher without getting new window panels or freaking out by putting new holes in the wall, so they just stayed there:

I finally got the courage to make more holes in my walls and raise them up to the ceiling. I figured the panels would just cover the holes anyway. Right?Yeah...I love quick fixes :)
Since the panels were too short, I just added some fabric I got from Joanns to the bottom of the white (and of course, Joanns was having a 50% off sale on their red tagged fabric, so as usual....I got more than I really needed. So that means, more sewing projects for me!)
With all the fixes, here's our front room today:

It totally makes the room look more grand. And it brought a whim of formality.
With adding the fabric to the bottom, I wasn't liking the tabs on the top ~it was just too casual, so I just folded them and secured them under to look like this:
This was sooo simple to do, I have done it with almost every window in our house, mainly because I hate sewing curtains....and this totally takes care of that.
I measured where I wanted the panels to hit the floor....and made sure both panels were exactly the same to match up the line where the white fabric stops and the blue begins.
I then folded the panel over, measured and secured it with cafe curtain rings:
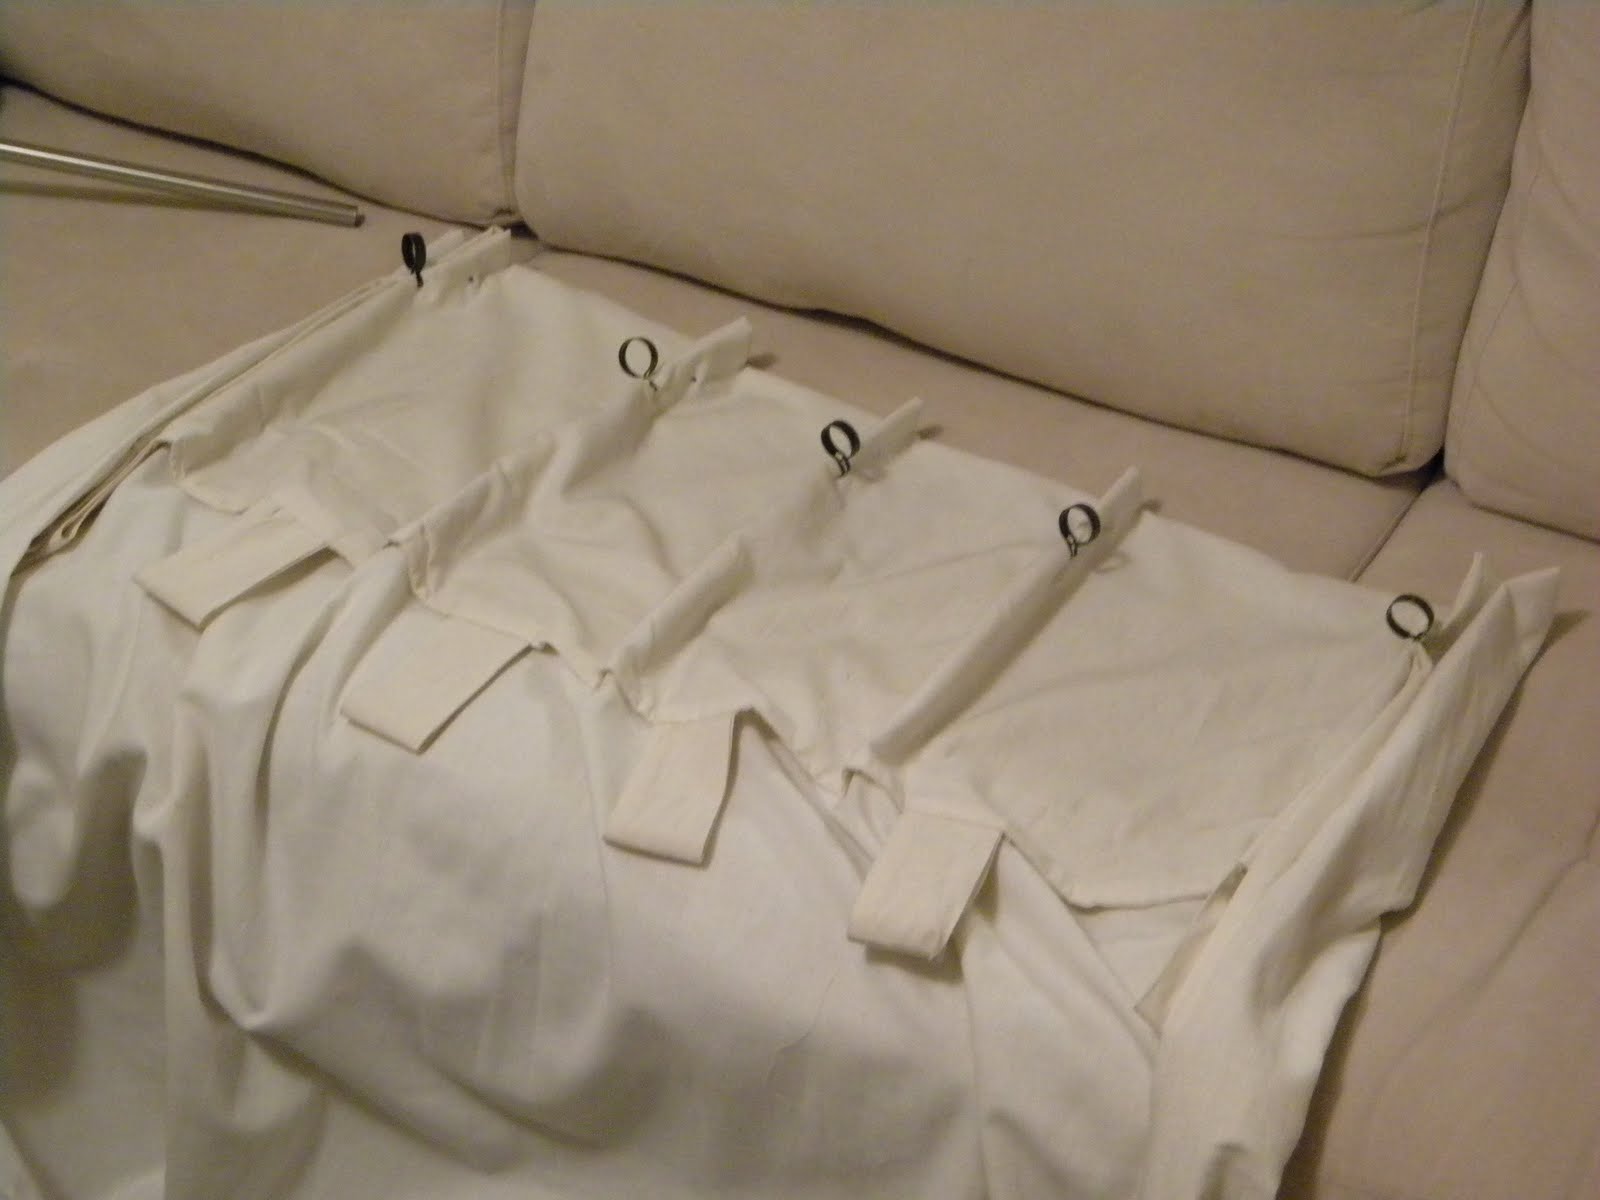
To keep the pleated look all the way up to the top and so they wouldn't fall over, I secured the upper portion with a pin and bent it back towards itself (this totally could have been down with a safety pin...but I couldn't find any):

If you are going to do this....make sure each panel is identical, so you don't have one panel higher to the ceiling than the other...I think I measured my 'pinch' with the cafe curtain rings at about 2" from the top. It took me ohhhh about 4 or 5 times of putting the rod and curtains up, then taking them back down to get a perfect measurement. But it was worth it.
Yay! Now I can actually go and sit in the room and not stare sorely at the window treatments :)
Now....I'll stare happily :)

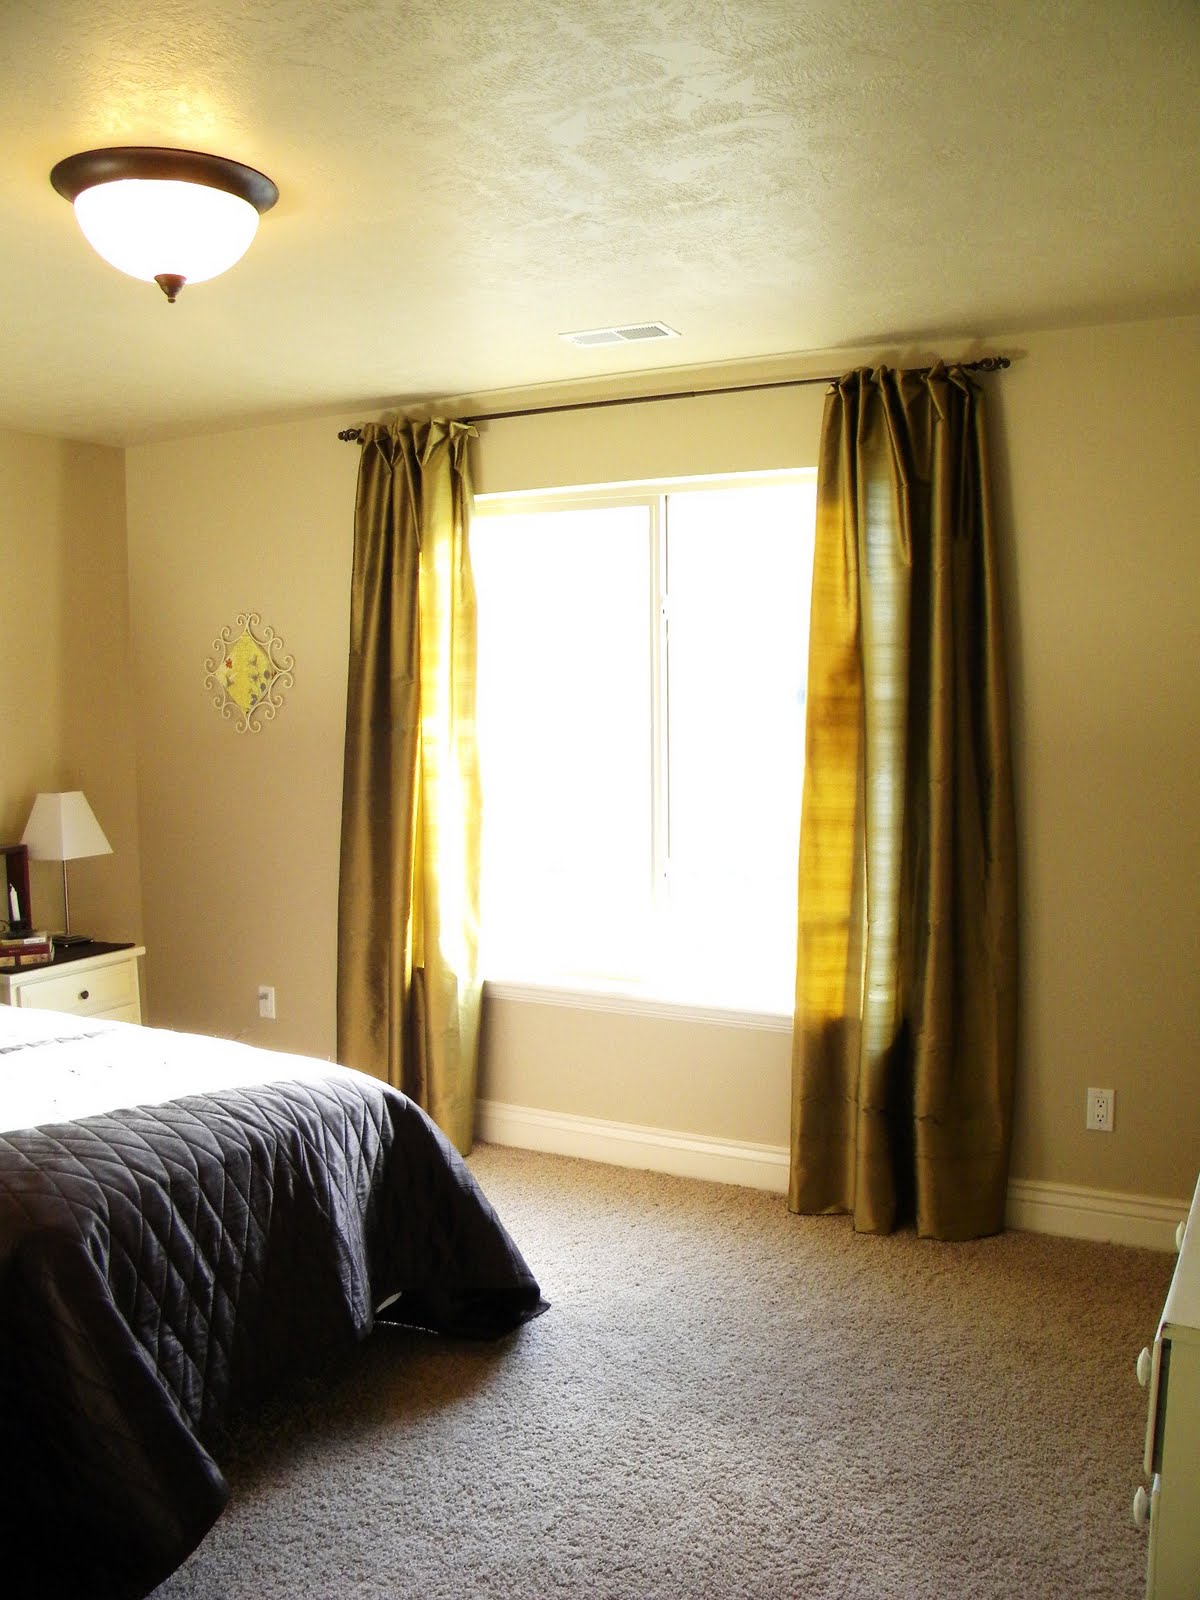
Here I did the same thing with just about six yards of fabric in our guest bedroom.
I hung these ones pretty wide, so I'll probably fill in the empty space with two more panels or some bamboo blinds:
These are the french doors in our dining room. I did the same thing with about six or seven yards of fabric...total no sew curtains.
Love it!

(don't mind the pheasant tail in the top corner....I guess its his house just as much as it is mine.......)


")

